
Restart a Hydroponics System After Six Months
A hydroponic system can be reused after six months, but inspect, clean, and test it before adding plants. To restart it safely, separate working equipment from evidence of a successful crop.
The older DIY greenhouse setup in this hydroponic restart video offers a practical example: reconnect the plumbing, deal with loose net pots, and plan a small lettuce trial. A running pump is encouraging, but healthy growth and a harvest still have to follow. Start by finding out which parts deserve another season.
Key Takeaways
- Inspect the pump, plumbing, channels, electrical parts, and growing area before restarting a system that has been idle for six months. Replace damaged or unsafe components.
- Remove debris and scrub equipment before sanitizing. Follow the product label, rinse as directed, and run a water-only test to check circulation and leaks.
- Prepare fresh hydroponic nutrient solution for seedlings, check its pH, and confirm the reservoir can hold water during operation and after shutdown.
- Start with a small lettuce crop and monitor flow, solution levels, plant condition, and growing conditions before expanding.
How to restart a hydroponics system after 6 months
Before buying nutrients or seedlings, walk through the entire system with the power disconnected. Six months of inactivity can leave dried deposits, trapped debris, and damage that only becomes obvious when you handle the parts.
Use this first-pass checklist:
- Inspect the channels and reservoir for cracks, dirt, algae, old roots, and brittle plastic.
- Look through tubing and fittings for clogs, kinks, loose connections, and worn seals.
- Examine cords and plugs for damaged insulation, corrosion, or signs of overheating.
- Clear the growing area of dead plants, standing water, pests, and unstable supports.
Replace damaged or unsafe components. Tape over a cracked fitting or an electrical fault isn’t a dependable repair.
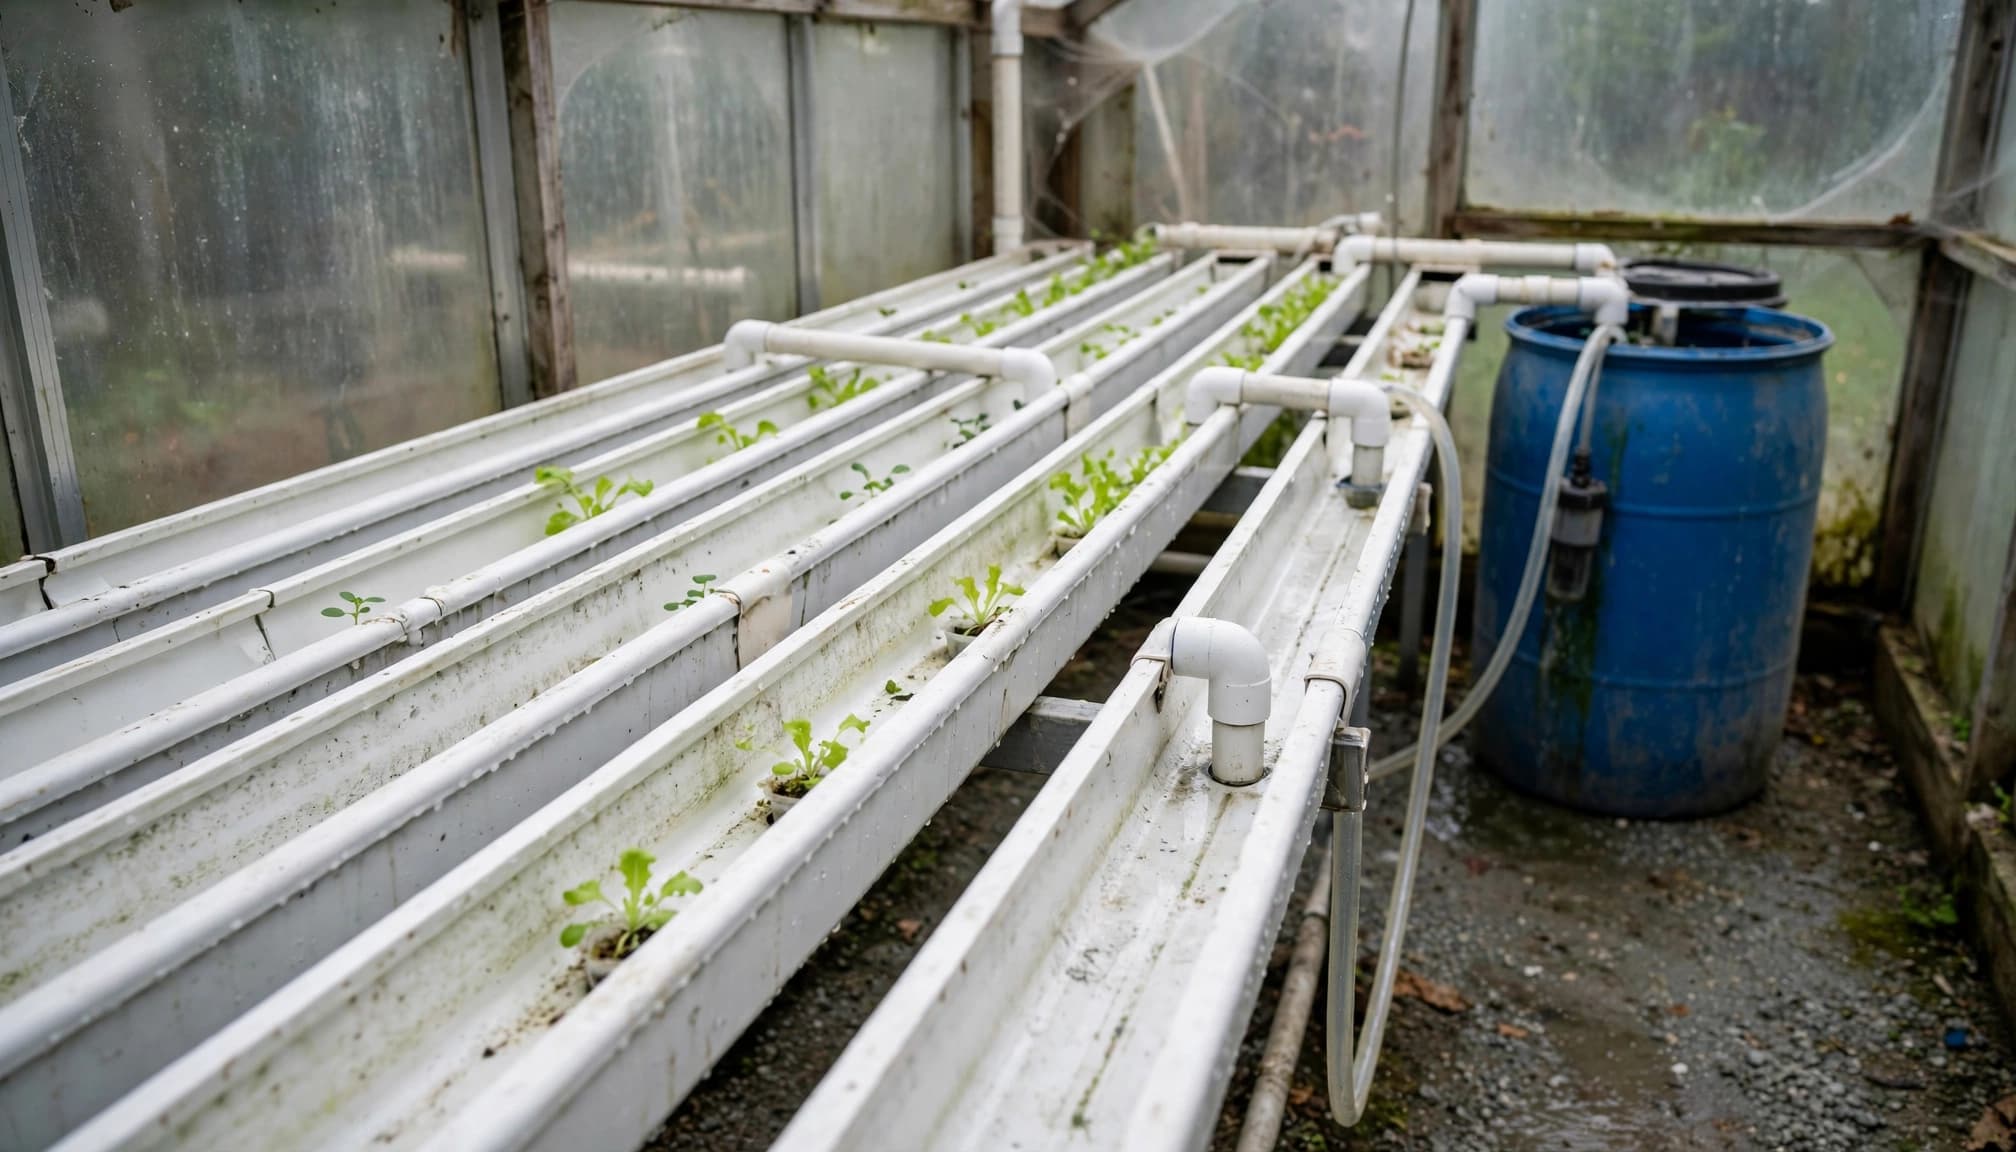
Inspect the pump, plumbing, and grow channels
Reconnect the return drum, tubing, and elbow fittings so water has an unobstructed route back to the tank. Support the plumbing rather than letting a heavy hose pull against a fitting. Also, make sure channels haven’t shifted or developed low spots.
Before a powered test, remove debris and complete the cleaning process below. Then fill with plain water, submerge the pump as its instructions require, and run it while watching every joint. Use GFCI-protected power and keep plugs and connections away from wet surfaces.
In the video, the unit runs and water visibly returns to the drum. That demonstrates circulation during that test. It doesn’t establish the condition or reliability of every older unit.
Listen for unusual noise and watch for weak flow or interruptions. If the unit leaks, smells hot, or has damaged wiring, stop using it. Never reach into the reservoir while equipment is energized.
Fix net-pot holes that are too large
An oversized opening can leave a net pot tilted, loose, or at risk of dropping into the channel. Fix the support before planting, when adjustments are easier and roots can’t get caught.
The video shows a practical repair: a short piece of pipe cut into a saddle or collar around the opening. The curved support gives the pot’s rim somewhere to sit when the original hole is too wide.
Use clean material suitable for the growing system, and smooth rough cut edges. The collar should rest securely without obstructing the channel or return flow.
Test the fit with the pot and its damp growing medium in place. It should sit level and stay put under light pressure. Leave space for roots to grow through the basket.
If the collar rocks or slips, use a better-fitting support or replace that channel section. A loose repair becomes harder to correct once lettuce roots spread.
Clean and test the system before adding nutrients
Cleaning removes dirt and organic material. Sanitizing follows cleaning and reduces microorganisms on suitable surfaces. Putting sanitizer into a dirty tank skips an important part of the job.
Empty the system and remove old roots, loose debris, and used growing material. Next, take apart accessible fittings and scrub the reservoir, channels, and removable components. The University of Minnesota Extension’s small-scale hydroponics guide includes scrubbing equipment and rinsing away soap during cleaning.
Afterward, sanitize only with a product labeled for the equipment and intended use. Appropriate sanitizing reduces pathogens on cleaned surfaces. Follow the product’s dilution, contact-time, handling, and rinsing directions.
Never mix cleaning chemicals. Also, never assume a toilet cleaner is safe for growing equipment. A product designed for bathroom fixtures may contain ingredients unsuitable for surfaces that contact nutrient solution or edible crops.
Don’t add plants while cleaner residues or odors remain. However, the absence of odor alone doesn’t establish that a surface is ready. Complete the required rinse process even when everything looks clean, then protect cleaned surfaces from dirty tools and splashes to prevent recontamination with pathogens.
Flush the reservoir and channels after sanitizing
Refill with clean water and run a short water-only circulation test. This lets you assess the unit, channels, and return path together while flushing accessible plumbing after cleaning.
Watch where water enters each channel and returns to the drum. Examine elbow fittings, hose connections, and the reservoir outlet for drips. Also, look underneath the setup, where a slow leak can escape notice.
A clear return stream doesn’t prove that every channel receives enough flow. Inspect each growing channel and remove any remaining obstruction before proceeding.
Hydroponic equipment still needs careful sanitation. The University of Vermont’s hydroponic produce-safety guidance explains that incomplete cleaning and sanitizing of water-contact and food-contact surfaces can create risks.
Drain the rinse water before preparing nutrients. If the sanitizer label requires another rinse, repeat it with fresh water. Don’t keep circulating the same rinse water and assume the cleaner has disappeared.
A water-only test can reveal leaks and circulation problems, but it doesn’t confirm that cleaning residues or crop-health problems are absent.
Prepare fresh nutrient solution for the first seedlings
Use clean water and nutrients formulated for hydroponic growing. If you’re unsure about your source water, check its water quality before mixing the solution. Mix at the label rate appropriate for lettuce seedlings, including any directions for young plants. Don’t reuse solution left in the tank during the six-month break.
For a multipart nutrient product, add each component to the water as directed. Avoid mixing concentrated components together before dilution because incompatible ingredients can precipitate. Check the mixed solution’s pH before planting.
Check pH and EC when mixing, daily during the first week, then every two to three days for the next two weeks and after substantial top-offs. Adjust as needed based on crop-appropriate guidance. Out-of-range pH can contribute to nutrient lockout and impair nutrient uptake.
Reservoir capacity also matters when you restart a hydroponics system. There must be enough solution to keep the unit operating correctly while water fills the channels. At the same time, leave room for water that drains back when it stops.
Test that stop-and-return behavior before planting. An overflowing tank or exposed intake needs correction first.
Keep the tank covered with a suitable lid that limits debris and light. When adding make-up water, keep its water temperature close to the prepared solution and avoid water that’s markedly colder or hotter. Finally, record the amount of water and nutrients you add. That gives you a useful starting point when comparing later batches or troubleshooting plant growth.
Choose NFT or Kratky for your first lettuce crop
The video discusses nutrient film technique, usually called NFT, and the passive Kratky method. Both can grow lettuce, but their water management differs.
NFT uses a circulation unit to move a shallow film of nutrient solution through growing channels. Oregon State University Extension’s nutrient film technique guide describes this thin, continuous flow. The shallow flow exposes the root zone to air while keeping it moist. A circulation interruption or blocked inlet needs prompt attention.
Kratky uses no powered circulation. Plants draw nutrient solution from a container, and an air space develops as the level falls. That air space gives part of the root system access to oxygen, so routinely filling the container to the original level can cause problems.
Deep Water Culture offers another comparison. It keeps the root zone submerged and relies on an air pump to maintain dissolved oxygen.
The practical differences can help you choose:
| Consideration | NFT | Kratky |
|---|---|---|
| Water movement | Circulating solution | Stationary solution |
| Main equipment concern | Circulation and plumbing reliability | Suitable container and lid |
| Early monitoring | Flow, leaks, reservoir level | Solution level and root air space |
Choose the method your equipment supports reliably. Both need clean surfaces, consistent lighting, and suitable growing conditions.
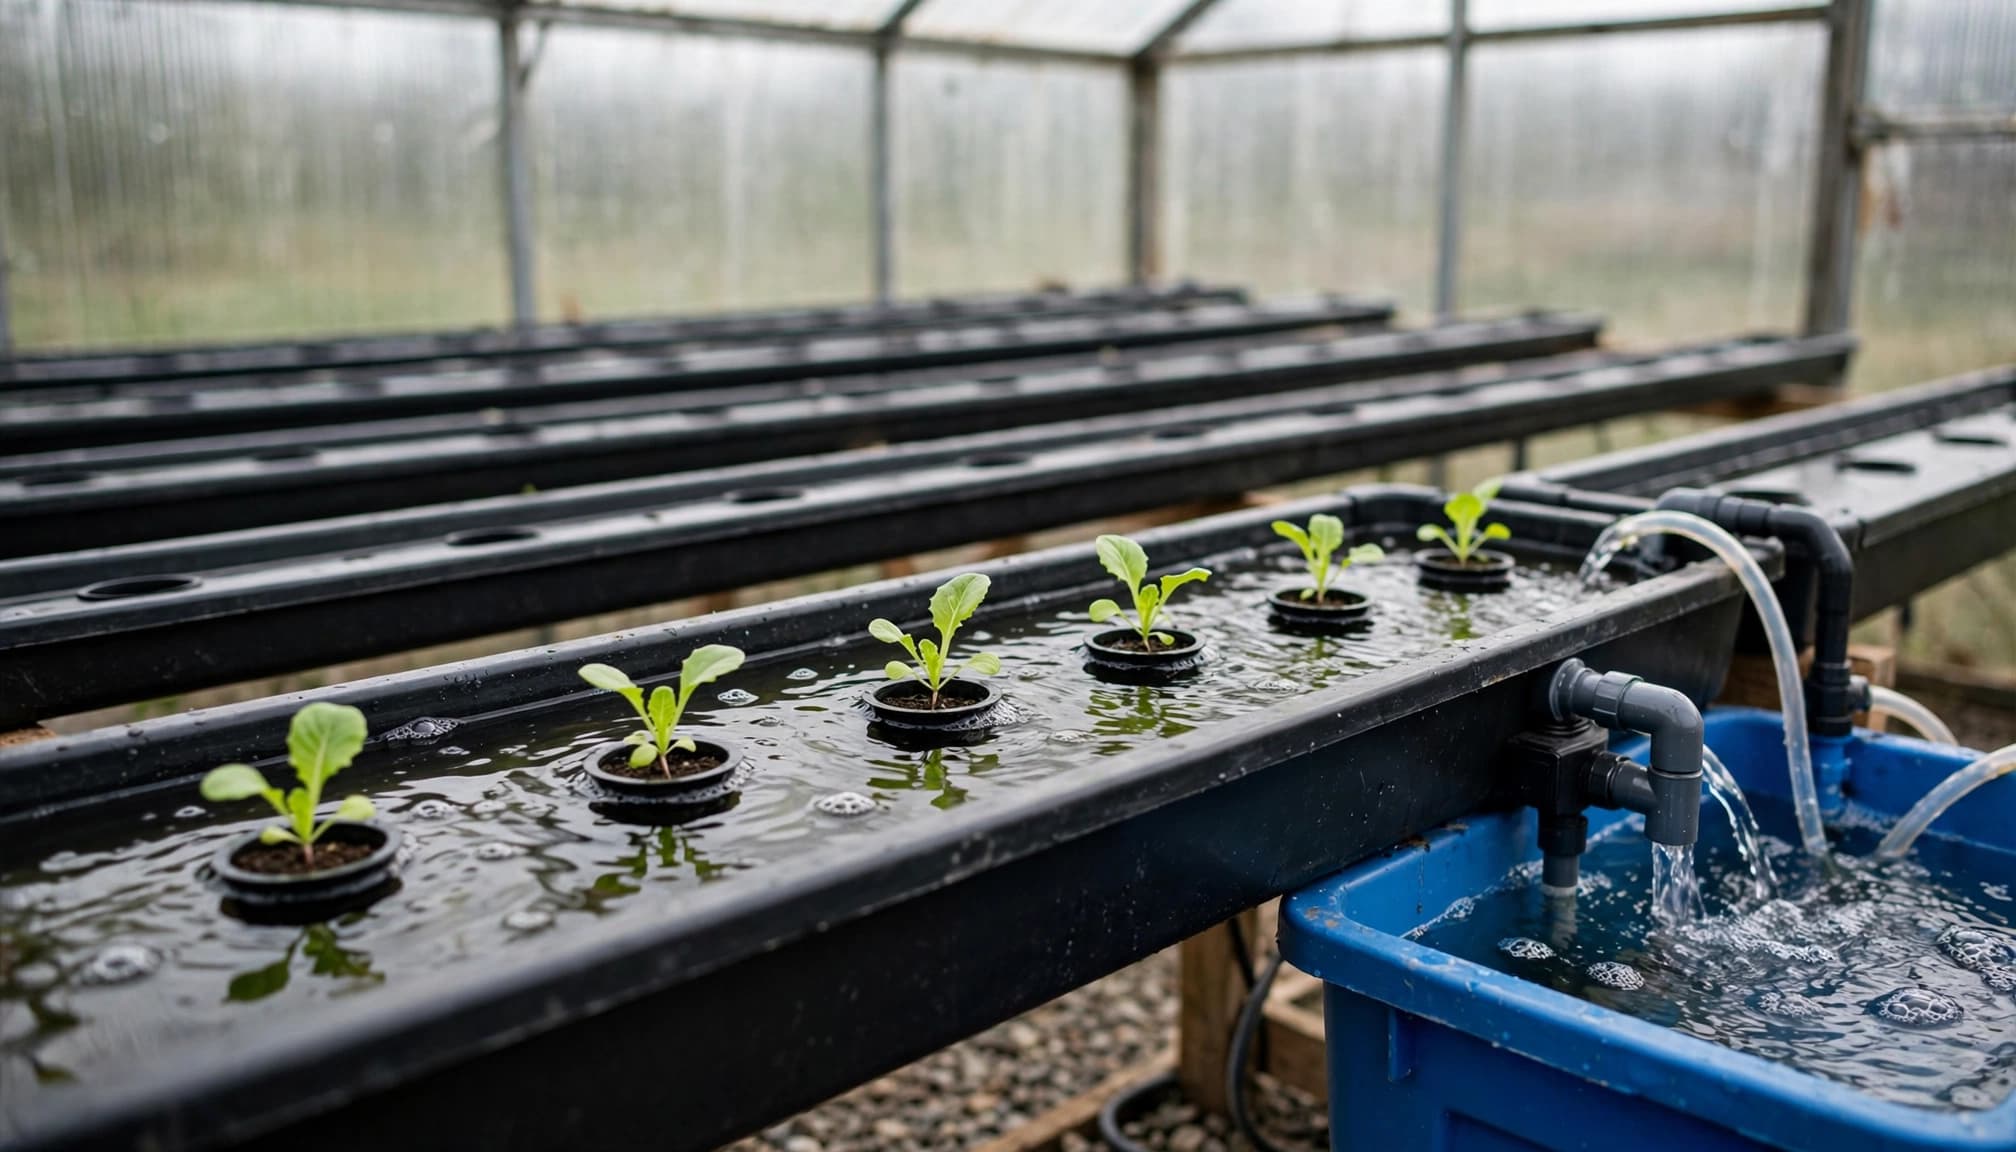
Start small with six lettuce seedlings
The six lettuce plants planned in the video make a sensible restart batch. A modest number keeps the first trial manageable and makes uneven growth easier to notice.
Choose healthy seedlings with intact roots and firm stems. Place them in secure net pots, keeping the growing medium stable without burying the crown. Handle roots gently rather than pushing or stretching them through the basket.
In NFT, position seedlings so their roots or suitable starter plugs can access moisture. Check that every occupied channel receives flow. For Kratky, give young roots access to solution while preserving the air space the method needs as plants develop.
During early growth, inspect flow or solution level daily. Wilting, discolored leaves, unusual root odors, or pests can signal stress and need attention. Warm, poorly oxygenated solution can contribute to root rot. Watch for signs of root rot, but don’t treat any one symptom as a definitive diagnosis.
Also, ventilate the greenhouse and monitor humidity and temperature, especially when heat builds up. Check lighting placement and consistency before interpreting weak growth. Working plumbing can’t compensate for unsuitable growing conditions. If several plants decline together, investigate shared conditions before adding more seedlings.
Track results before expanding to microgreens
Keep a short record of the cleaning product and procedure, circulation behavior, leaks, nutrient mixing, and plant condition. Date each entry so you can connect a change in growth with an adjustment.
Photos taken at the same angle can help you compare leaf development. Record interruptions too, including power loss, an empty reservoir, or a blocked inlet. These details explain more than a note that says the lettuce “looked poor.”
Sanitation records deserve attention alongside growth observations. A published study on hydroponic facility sanitization highlights the importance of rinsing systems after sanitizer treatment.
Microgreens can be a later experiment, once the lettuce setup runs reliably. They often use dense sowing in shallow trays, so they need their own growing arrangement rather than an automatic transfer into lettuce net pots.
The video provides a restart example and a planting plan. It doesn’t establish a completed crop or successful harvest. Keep that distinction in your own records as well.
Frequently Asked Questions
Can a hydroponic system be reused after six months?
Yes, if its components are in good condition and the system is cleaned, sanitized, and tested before planting. Inspect for cracks, clogs, worn seals, damaged wiring, and other problems, and replace unsafe parts.
How should I clean a hydroponic system before restarting it?
Remove old roots and debris, then scrub the reservoir, channels, and removable parts before sanitizing suitable surfaces. Follow the sanitizer label’s directions for dilution, contact time, handling, and rinsing, and don’t mix cleaning chemicals.
Does a water-only test show that the system is ready for plants?
It can reveal leaks, weak circulation, and problems with the return path, but it doesn’t confirm that cleaning residues are gone or that growing conditions are suitable. Complete any required rinsing and inspect each channel before adding plants.
Should I use NFT or Kratky for a first lettuce crop?
NFT circulates a shallow film of nutrient solution through channels, so its flow and plumbing need attention. Kratky uses stationary solution and needs a container that allows an air space to develop as the solution level falls.
Restart small and let reliability guide expansion
A six-month break doesn’t automatically make a hydroponic system unusable. Inspect it, replace unsafe parts, clean and rinse it properly, and test circulation before planting.
The strongest early result is reliable operation: secure pots, consistent water movement, and no leaks. Healthy plant growth must follow before you can judge the restart a success.
Begin with a small lettuce crop, such as six seedlings. Expand only after the equipment and plants show that the setup is ready.